The ceiling – the fifth wall – so often painted, because let’s face it, that feels fairly straight forward to do, but seldom adds drama – and yet, wallpapered feature ceilings seem more in vogue than statement walls with searches for them on Pinterest up 310%.
How To
How to Wallpaper the Ceiling
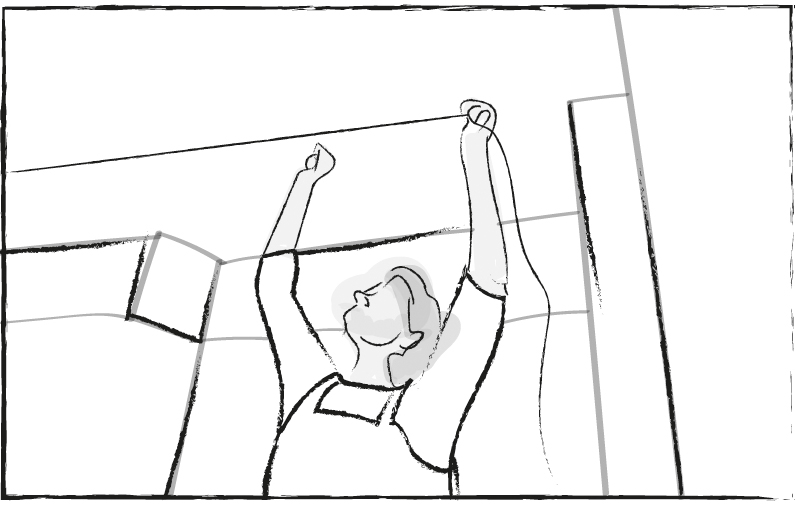
Oh, what a feeling! When there's wallpaper on the ceiling!
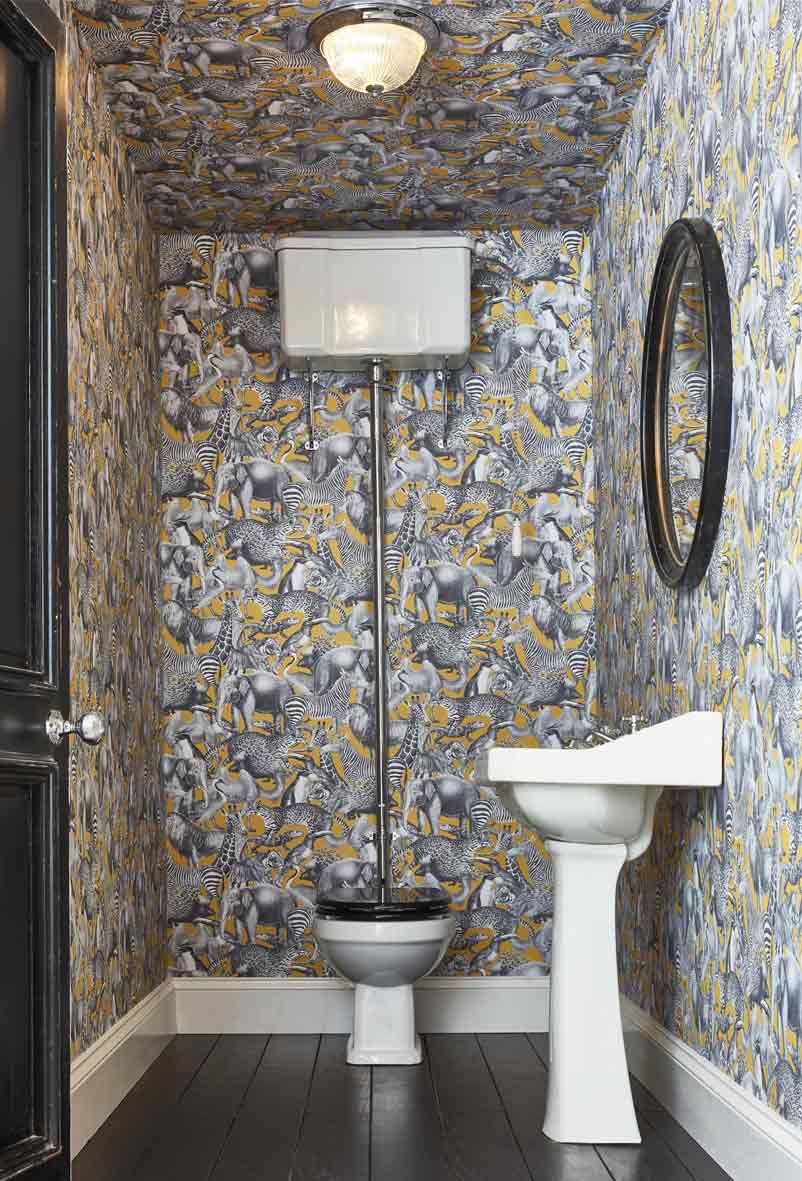
Now it’s one thing wallpapering a wall, but wallpapering the ceiling? Yep, we’d probably call in a decorator too – but if budget is prohibitive, or you’re just one of those can-do people who relishes a challenge, or loves to pick up new skills, then our how to guide can hopefully walk you through, and then take you down from the ceiling.
All Graham & Brown wallpapers are easy to install, whether you hire a decorator, or choose to do the task yourself.
This is because they are printed on what is often referred to as, paste the wall wallpaper. This is the easiest way of hanging wallpaper right now – and all our papers have this technology.
Tools you will need:
For preparing your ceiling:
- Wall Filler
- Sandpaper
For installing the wallpaper:
- Stanley knife and or,
- Wallpaper scissors (to cut the paper)
- Graham and Brown wallpaper paste
- Bucket - to mix the paste in
- Spirit level with straight edge
- Tape measure and pencil
- Pasting Brush or Roller and Roller Tray (for applying the paste)
- Wallpaper brush or Smoother – for ensuring paper is stuck down
- Seam Roller – to ensure seams are level
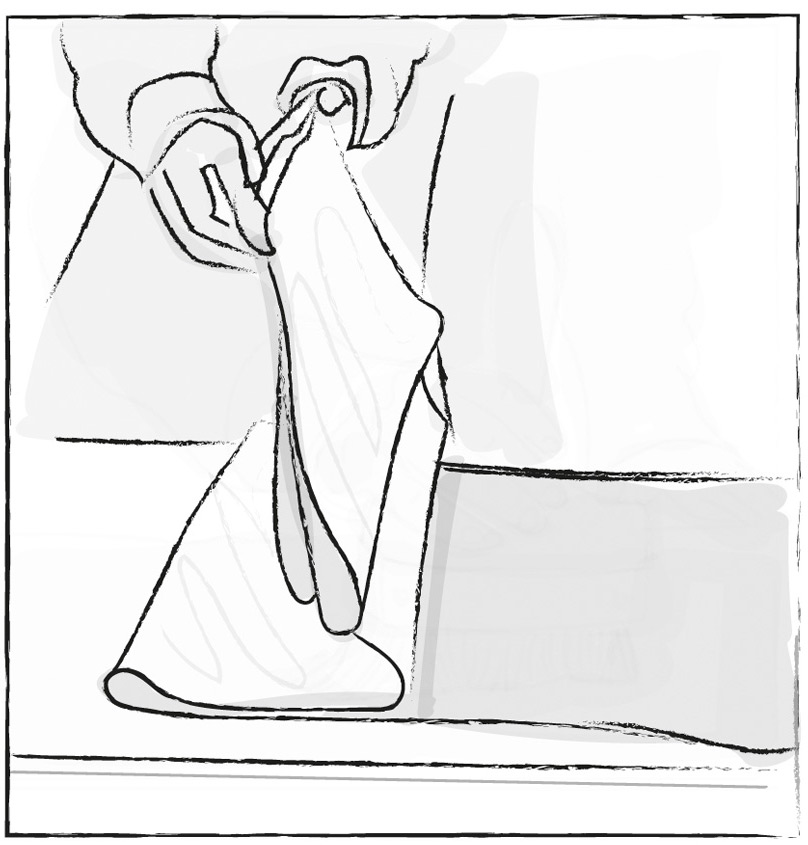
- Clean damp cloth – to clean off any paste on wallpaper surface and smooth seams
- Pasting Table (optional) depending on the size of the ceiling
- x 2 Ladders and Board/Plank (For easiest way to work build a “scaffold” so you can walk along between the two. Always take extra care when working with ladders.)
- A good friend who will help you!
- Tea, Coffee and a mountain of biscuits!
Instructions:
Papering the ceiling involves some considerations that are different to when you wallpaper walls.
Starting Points:
See point 1
See point 2
See point 3
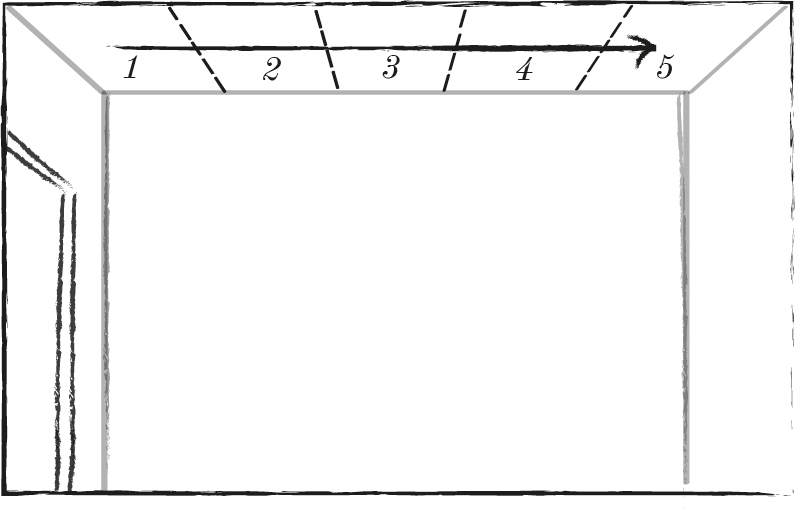
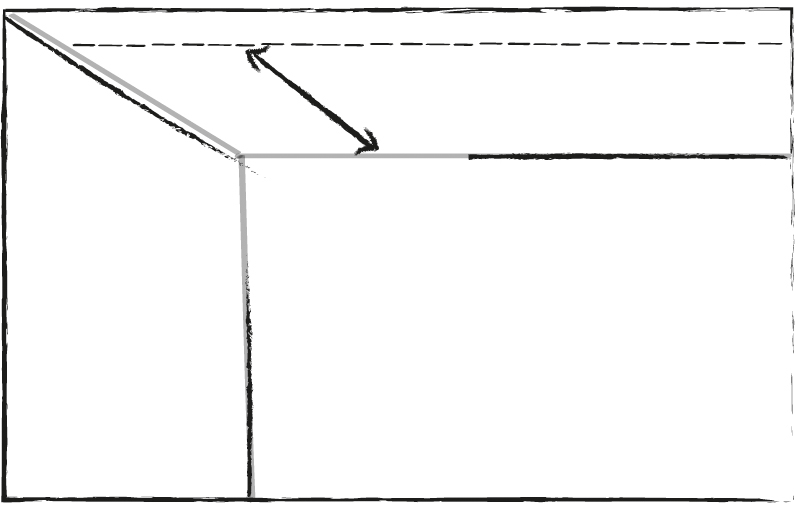
- When hanging wallpaper on the ceiling it is best to hang lengths moving away from the natural light source (windows) – this reduces the chance of any overlapped edges appearing when viewed across the room.
- When hanging patterned wallpaper to the ceiling it’s desirable to centre the paper in the middle of the ceiling to an enable an even pattern effect across the whole ceiling.
- For odd shaped rooms (and therefore ceilings) it probably best to hang the longest length of paper first and work away from there.
Top Tip
In some cases, it may be worth working out how much cutting there is to determine the direction – i.e. go with the direction with least amount of cutting in order to reduce waste.
Prepare your ceiling:
- Fill and sand any imperfections on your ceiling.
- Clean the ceiling with detergent or sugar soap.
On fresh plaster:
- “Size” the ceiling – this means make up a diluted solution of paste and liberally apply to the walls being decorated and let it dry.
- This will be absorbed into the porous plaster and will stop the paste being absorbed when it is applied.
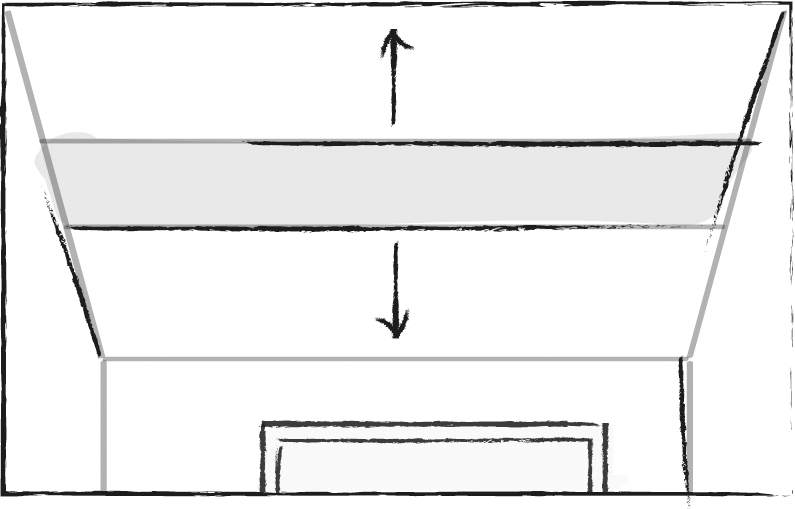
Marking out your ceiling:
See point 1
See point 2
- As with walls – it’s important to get the first length absolutely straight. Where the ceiling meets the walls are not usually straight enough to use as a guide. It is better to use a chalk line or use a spirit level to mark out a perfectly straight line to work from.
- Measure a width of wallpaper out from the wall you are running parallel to and remove 2 centimetres. Draw your guideline here. This will mean the wallpaper once trimmed will finish flush to the wall.
Which type of wallpaper?
- All Graham & Brown wallpapers are paste the wall. This is convenient when it comes to the ceiling as it gives you the option of applying the paste straight to the ceiling, or to the length of paper you want to install.
- Depending on the size of the ceiling and therefore the length of wallpaper to be hung, will determine the best method. For our instructions we are going to assume that the lengths are quite long and therefore recommend they are pasted first rather than pasting the ceiling. Both applications methods work. Our paste the ceiling instructions are here:
Instructions for wallpapering the ceiling

See point 1
See point 2
See point 4
See point 5
See point 6
Read through all the instructions first
Top Tip
Measure twice, cut once!
Top Tip
Its normal to carry out a test run first. Are you applying enough paste to beat gravity? Does it work better to apply the paste to the wallpaper rather than the ceiling? Conditions in different homes will make a difference.
Top Tip
Its normal to carry out a test run first. Are you applying enough paste to beat gravity? Does it work better to apply the paste to the wallpaper rather than the ceiling? Conditions in different homes will make a difference.
- Measure the length of wallpaper you need, cut it to that length and then using a pasting brush apply the Graham & Brown paste to the back. Apply your paste to the centre of the roll and then brush out to edges being careful not to get paste on the edges of the paper or the pasting table.
- As each pasting table length has been pasted, start folding in a concertina fashion. Try to ensure the folds are no greater than 30-35cm long as if they are too wide this will make you stretch beyond arm’s length.
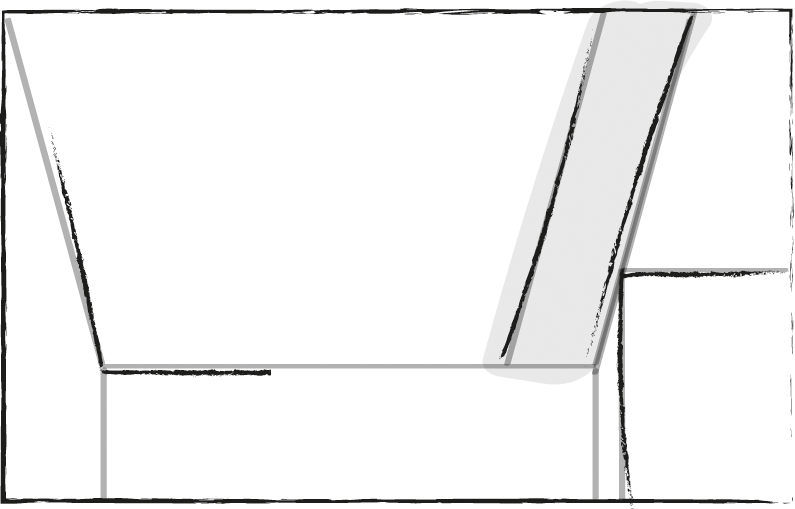
- Position the edge of the first length of paper against the pencil line you have drawn and smooth the other edge down over the ceiling wall edge to give you a 2cm overlap onto the wall or coving (if you have coving). If the edge of the ceiling is uneven then the overlap will be uneven rather than the wallpaper on the ceiling.
- Use a cardboard tub or spare roll to act as a crutch to support the weight of the paper during the hanging process. Using this method will prevent paper from falling around your head as the length is opened.
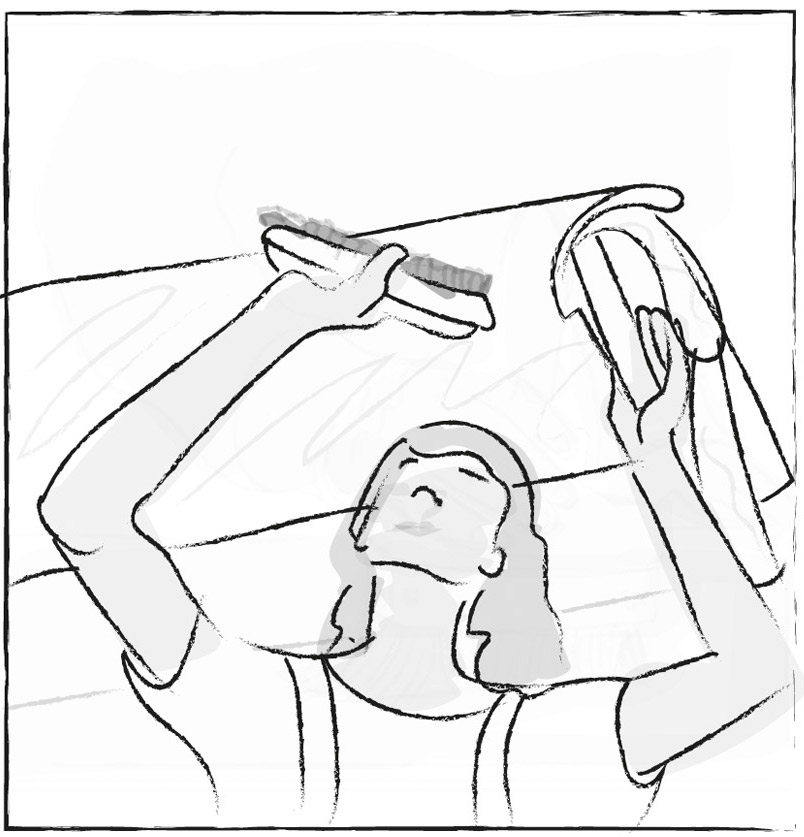
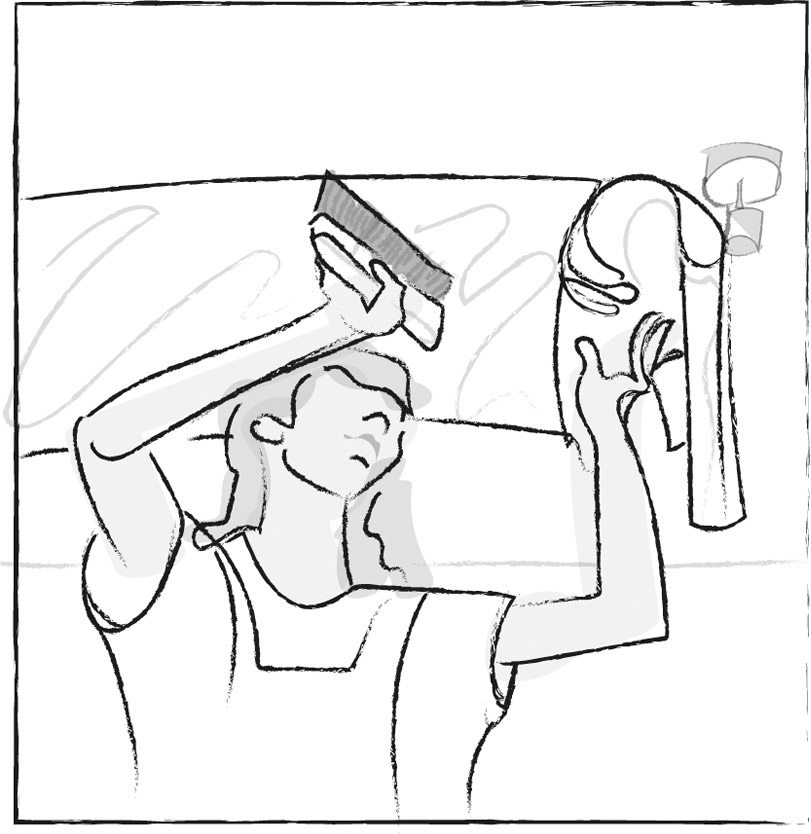
- Smooth the wallpaper flat with a wallpaper smoothing brush using a sweeping action brushing out from the centre to the edges. As each section is brushed flat, open the next concertina folds, ideally while walking along your plank (scaffold). Be super aware or where you are placing your footing – you don’t want a trip to A&E.
- When you have got to the end of hanging the length of wallpaper and have met the opposite wall score the paper, where the ceiling meets the wall (or coving). Lift the paper gently and cut along the score then fold the wallpaper back into place – apply extra paste if necessary.
- Repeat for the next length ensuring that you smooth and butt edges together and match the pattern.
paste the wall (ceiling) wallpapers:
See point 2

See point 3
- The instructions for this are the same as paste-the-paper only there is no need to cut the lengths first.
- Instead paste the ceiling first ensuring to paste an area wider than the width of wallpaper.
- Now you should have the roll in one hand the wallpaper brush in the other – it can be a trickier combination if it is a large diameter roll, but if your friend is still here, one could unfurl the roll while the other smooths. This would cut the decorating time in half.
The tricky bits:
Now you have mastered the basics of hanging wallpaper, here are some of the challenges that you may face, and how to overcome them.
How to wallpaper around light fittings and ceiling roses?
See point 5
- Switch off the mains power in your home before starting.
- Unscrew the fitting and pull away from the ceiling.
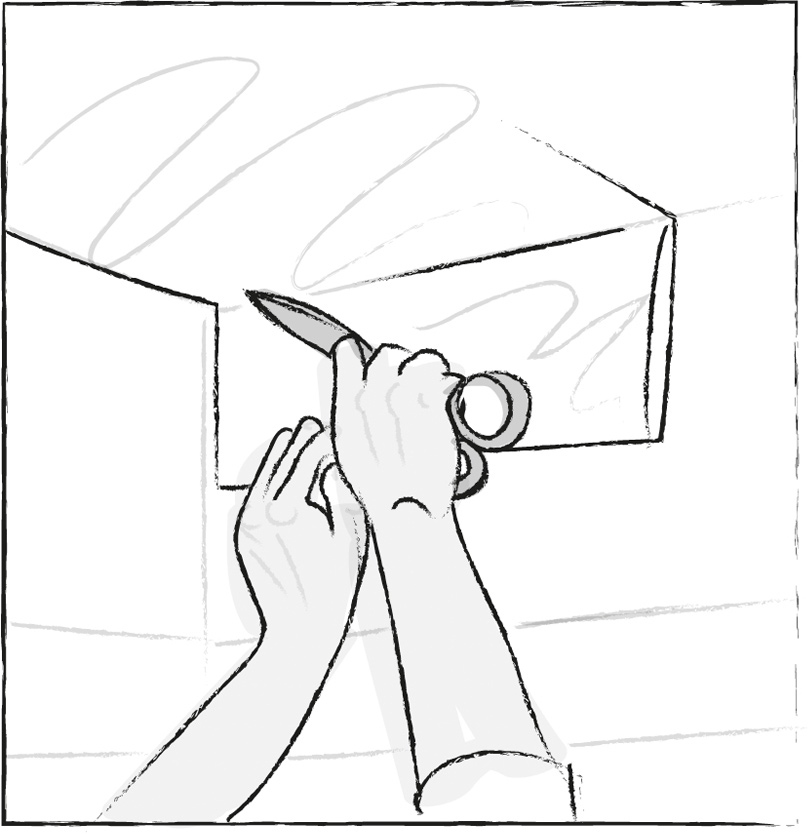
- When the wallpaper meets the fitting try to hang the paper over it. The fitting will protrude under the paper. Cut a series of cuts from the centre point outwards to the radius of the fitting. This effectively creates a “hole” from which the fitting can be pulled through.
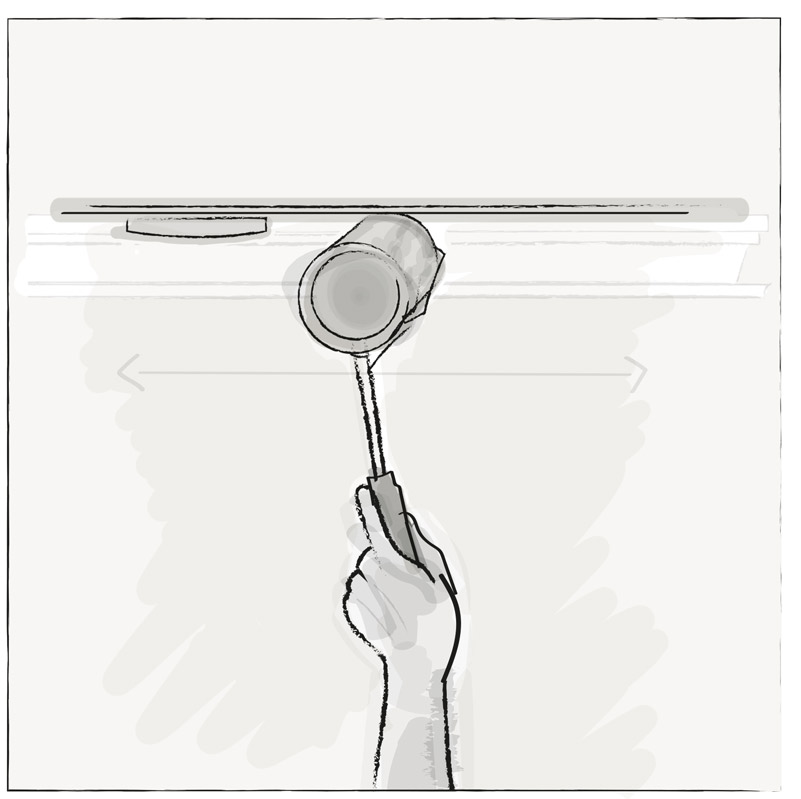
- Smooth the paper down onto the surface and the fitting should now fit through the hole you have made. The fitting can be screwed back into place and should give a flush fitting as though the paper runs “under” it.
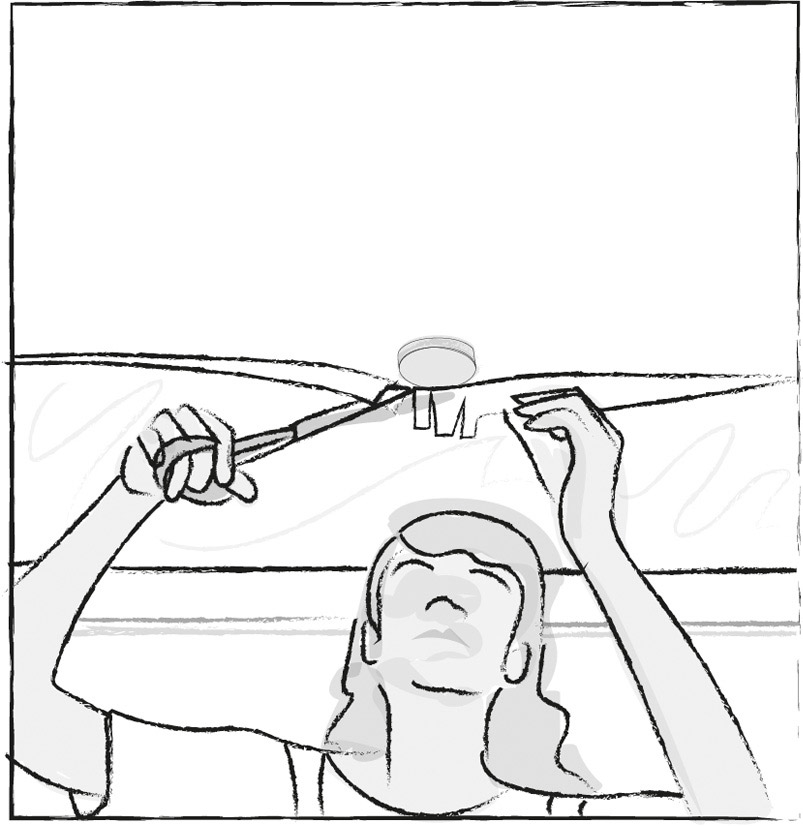
- For ceiling roses make small cuts in the paper outwards from where the paper meets the Rose. Once this has been done push the rose through the paper and loosely press the paper into place. Hang the ceiling paper, and trim off the excess around the rose.
Did you make it this far?
We told you it wouldn’t be easy, and this is why there are professional decorators out there – but hopefully if you got this far, you’ve achieved a wonderful effect, or you haven’t been put off, and will want to begin choosing your feature ceiling from our range: Browse our Wallpaper collection or if it is too much of a challenge maybe just painting it is where your skill set is at, and we have the perfect product for that too.